Winterfest Highlights!

Winterfest 2014 - Eric Meyer
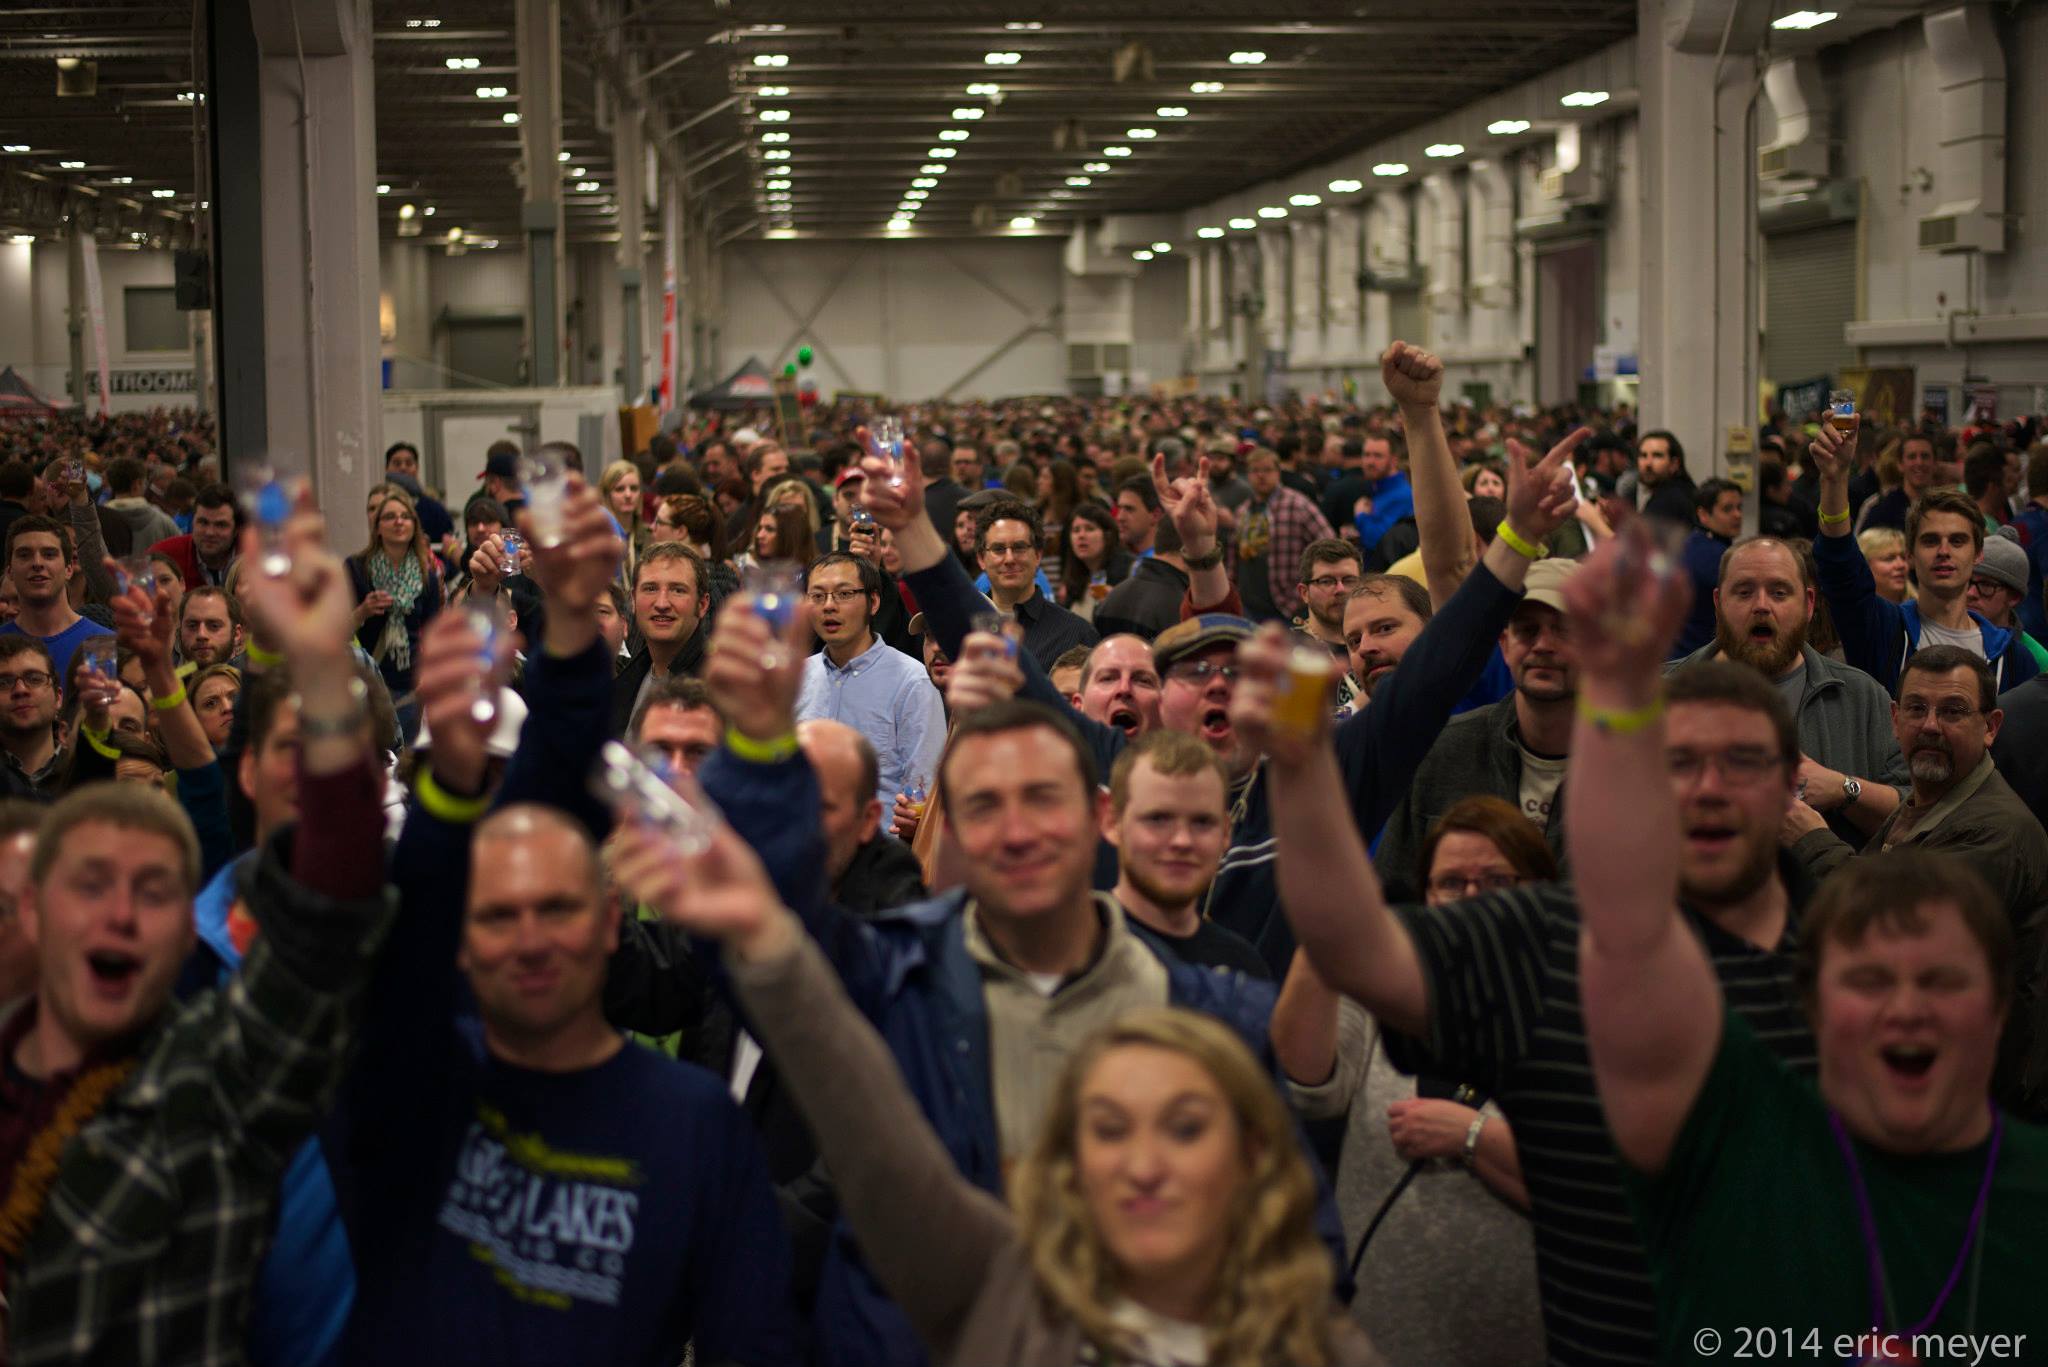
When’s the last time you remember holding your glass in the air and cheering with 5,000 other beer enthusiasts? Believe it or not, this post took me almost a week to create. There were so many people that worked their tail off to make Winterfest 2014 a success. A very special “Thank you” to the breweries that participated, the Brewers of Indiana Guild, Hoosier Beer Geek, and the 100+ volunteers that made this happen. The planning and execution of this beer festival were top notch. We had an awesome time pouring at Winterfest, and we also wanted to thank everyone that dropped by to say hello and sample our offerings.That said, this year’s Winterfest was HUGE. We loved the extra space that Champion Hall provided, however it was soon consumed by the 5,000 beer loving ticket holders. This was by far the largest beer tasting I’ve ever been to. Note to self: VIP tickets at Indiana beer tastings are becoming more and more validated 🙂 Eric Meyer has a fantastic photo album documenting the debauchery.  Either way, I wanted to take some time to share some of my favorite picks from this past weekend. Here it goes:

Upland+Logo_New+Horizontal+copyNL The Upland Sour Barrel Spin Game
Upland used a Twitter password to allow entry into this Wheel of Fortune! The wheel included Raspberry, Cherry, and Kiwi Lambic, and also the much coveted Sour Reserve 4.
Zwanzigz BrewingZwanzigZ Brewing Eisbock
This beer was fantastic! This style of beer is created by freezing bock beer and removing the ice. This method concentrates the flavor and abv. Great work and thanks for sharing!
Country Boy BrewingCountry Boy Brewing Chestnut Brown Ale
We were lucky enough to pour right next door to Country Boy Brewing. This beer really stood out for me. Very easy drinking and flavorful brown!
New Albanian BrewingNew Albanian Phoenix Kentucky Komon Ale
This beer was great! Kentucky Common beer has the unique history of being America’s first sour! Lactobacillus is used to create a twang sourness that complements the malt profile of this beer. New Albanian pulled this one of brilliantly.
Planetary Brewing Logo Planetary Fly Casual Brown Ale
This was my first Planetary beer, and I was pretty impressed. I’m a sucker for Brown Ales. I’m sure I’ll be enjoying more Planetary beers in the not so distant future.
Three-Floyds-Big-LogoThree Floyd’s War Mullet
I’m not sure how long this keg lasted, but my guess is it went quickly. War Mullet is, at the moment, a very rare Imperial IPA created by FFF.
Flat 12 Bierworks LogoReposado Du Flat Saison/Farmhouse Aged 6 months in Extra Anejo tequila barrels.
The evil geniuses at Flat 12 created a saison that they aged in anejo tequila barrels. Everyone was talking about it the first couple of hours at Winterfest. I did not get a chance to try it, but I thought it was worth a mention as it seemed very popular.
Power House BrewingPower House Barrel Aged Diesel Oil Stout
Diesel Oil Stout is a fantastic beer. Seeing a barrel aged version at Winterfest was a great comfort 🙂
Rhinegeist BreweryRhinegeist Uncle English Dark Mild
We’ve been drinking a lot of English Mild beer lately and this one stood out. Smooth, great malt profile, and highly sessionable.
bier breweryBier Brewery 1.21 Gigawatts Belgian Strong and Hator Dopplebock
Both these beers were served at Bier’s 3rd Anniversary Party this past year. I was glad to see they still had some left for Winterfest. Cheers if you had the opportunity to try these rare beers!
MONK_logoMONK Wookie Tears English Brown Ale
These guys were great neighbors to us, and you can bet I made sure to sample each one of their beers. Wookie Tears English Brown was one of those great beers!
Bloomington Hop JockeysBloomington Hop Jockeys Sour Collection
There is no doubt that the Hop Jockeys have skill when it comes to brewing, but sampling their sour beer has become something to look forward to at these events. Thanks for sharing Luke!

Sierra Nevada Bigfoot Barleywine Timelapse

Sierra Nevada Brewing Company released a timelapse video of the open tank fermentation process used to make their famous Bigfoot Barleywine. For those of you who have never seen a high gravity beer fermentation this may seem pretty chaotic. The stainless steel vessels are cleaned, sanitized, then filled with cooled wort on which the yeast is pitched. The bubbly foam you see moving around on top/spilling over the side is referred to as the krausen. This is yeast and wort proteins, along with unfermentables and hop resins. It usually sticks to the side of the fermenter, and in this case spills over the sides of the vessel. Pretty amazing to see this process in timelapse! Great video Sierra Nevada!

Brewing Big Beer With Small Equipment

Too Much GrainThere is a special place in my heart for high gravity beer. Brewing it is even better. But sometimes your grain bill can exceed the capacity of your equipment. If you’ve already tried this I’m sure you’ll understand the frustration. You smack your yeast pack, get your strike water ready, and then… DOH! TOO MUCH GRAIN! First world problems I know. Don’t let that stop you 🙂 As long as you’ve got a decent pot there is still hope! Here are a few tips and techniques you can use to make big beers using small equipment.

1) Know Your Capacity

5 gallon mash tun

Hopefully you are reading this before you’ve already spilled grain all over the place. Knowing your mash tun’s capacity is CRUCIAL to make big beers. If you are trying to cram more than 13 pounds of grain into a 5 gallon mash tun you are in for a rude awakening 😉 Planning ahead when making a recipe, and taking into account the capacity of your mash tun will definitely reduce the amount cursing and last minute adjustments you’ll have to make to your batch. Here are some tools from the Green Bay Rackers Homebrew Club that will help you calculate the grain capacity needed for you recipes.

2) Make a Double Brew

what if i mashed with the wort from my mash

Ok, so your mind may not be completely blown by this concept, but it does actually work. Double brews involve mashing a normal batch, then pulling off your wort and heating it back up to mash with new grain. This means you can take an existing normal gravity recipe, and make an Imperial style by by mashing new grain with the wort you pulled from your first mash. I’ve tested this with a wheat recipe I make and had great results. I want to say that I had an OSG somewhere in the ballpark of ~1.110. Once you’ve pulled off your wort a second time, you can actually sparge again for a small beer. This is referred to as parti-gyle brewing. It will make for a long brew day, but you get 5 gallons of Imperial style beer along with 5 gallons of a session beer of the same style without maxing out your mash tun.

3) Extend Your Boil Time

add 30 minutes

Extend your boil from 60 minutes to 90 minutes. Extending your boil time causes more water to evaporate, and concentrates your wort which ultimately increases your OSG. Boil your wort for 30 minutes, and then add your hops on your normal hopping schedule. Just remember that your beer will be sweeter and will likely need more hops for the same bittering effect as a 60 minute boil to counter that sweetness. Usually big beers are mashed at a higher temperature. This helps increase body, but also leaves longer chains of sugars which are recognizably sweet. This works great on pretty much any batch. Apologies for the rampant meme use 🙂

3) Use A Yeast Starter and an Alcohol Tolerant Yeast

There’s a lot of sugars floating around in a big beer. The best thing you can do for your batch is make sure you have plenty of hungry yeast. I usually create a yeast starter by boiling a pint and a half of water along with 1/2 cup of light dry malt extract for about 3 minutes. Quickly cool this down to room temperature in the sink (I usually just put the lid on my pot and place it in a sink full of ice water), and then I pour it into a 2 Liter flask and pitch my yeast. If you have a stir plate it works out even better. If you don’t make a yeast starter, I would recommend using at least two yeast packets if not more. Remember, you want an army of yeast cells to take on a wort higher than 1.080. Here are some charts from Lugwrench Brewing Company showing the alcohol tolerance of Wyeast and White Labs yeast strains:

Wyeast LAbs - Alcohol Tolerance

White Labs Analysis - Alcohol Tolerance

Yeast Starters and Building a Quick/Dirty GhettoBlasting Stir Plate

Yeast StarterOne thing you might hear about as you get further along into homebrewing is the need for a “yeast starter” or “pitching rates.”  Below 1.060 gravity you can still get away with a single smackpack or vial of yeast and end up with a fermentation that finishes and has enough oomph to clean itself up afterwards.  But when you start looking into big Imperial style beers, barley/wheat wines, Double IPAs, etc a single serving of liquid yeast is simply not enough yeast to finish off such a big plate of sugar.  So now we need to make a starter!

erlenmeyer_small_For a typical big beer between 1.060-80 you will need at least a 1-Liter Erlenmeyer flask and you will need some DME (Dry Malt Extract) and you will need to brew up the DME for 1.040 of yeast starter goodness.  You need about 10g of DME per 100mL of starter so 1L will come in at 3.5 oz of DME boiled in 1L of water for about 15-20 minutes.  What I like to do is get the water boiling in the Erlenmeyer flask to sanitize it and then carefully pour the boiling water into a saucepan and boil the wort with the DME.  Once you have boiled the wort pour it back into the Erlenmeyer flask and chill it down like you would if you were brewing a small beer.  An ice bath in the sink will suffice.  This is why I put the wort back into the flask because I have found that the flask fits easier in the sink than a saucepan with a handle.

Once the wort is cool go ahead and pitch your yeast into the wort and allow 24-36 hours for the yeast to have reached their maximum population for the volume of wort given.  Aerate the wort as you would normally as well and place enough aluminium foil over the top to cover the flask but do not make the container airtight.  The yeast require that oxygen to grow optimally for the next 24 hours. Also keep in mind that increasing the gravity WILL NOT increase yeast count. It will only increase stress.  Less gravity will have a negative impact on yeast growth however so 1.040 is found to be a “sweet spot” so to speak.  Creating this starter will typically increase the number of cells from a pack/vial of 100 billion to 130-150 billion cells for a 1L starter.  Again, as I said if you need more cells you can go with a 2L starter and get ~180-200 billion cells.  Brewing a 1.110 OG barleywine and need about 350 billion yeast cells you say?  Well, that is where the stir plate comes in!
A stir plate will actually DOUBLE your yeast cell count from a non-agitated yeast starter.  So your 1L starter that produces 135 billion cells will jump to about 260 billion cells if properly agitated for 24-36 hours.  Agitation is a process that keeps the yeast cells from flocculating out of suspension, which also inhibits their continued growth.

You can spend upwards of $100 for a cheap stir plate or even more for a professional agitation unit OR…. You can build your own for anywhere between $15-30.

I just recently built one using this video as inspiration:

The one place where my build differs from Fo’s is I used a Thermaltake Mobile Fan II External USB cooling fan for the magnet mount.  This somewhat limits where I can plug in my stir plate as I don’t have a laptop but I didn’t feel like splicing the wire.  Splicing wire is not hard at all but I’m lazy and just felt like going the USB route and it works great.  Make sure you have a variable control for your fan RPM however.  When you first plug in/turn on your stir plate with your suspension in place the bar may not move right away and you will need to slowly increase the rate of spin to get it turning, taking care not to “throw” the stir bar.  Once the bar is turning you can then turn down the RPM if you so choose or leave it where it is.  As far as I know the speed at which the bar is spinning has little to no effect on the actual process.  So long as you are agitating the yeast cells and keeping them from flocculating and settling out, your stir plate is doing its job.

Here are some before/after screenshots from Beersmith showing its calculated difference between using a stir plate and NOT using a stir plate:
noSP_small_zpseac6bdf3No Stir Plate

yesSPsmall_zps5ed5d3db With Stir Plate

That is about it.  Here is a quick video of my own build in action:
http://www.youtube.com/watch?v=1pac4hHRYqs&feature=youtu.beI
I purchased the fan and stir bar on Amazon, the project box and magnets were purchased from my local Radioshack, and the mountings for the fan/variable control were purchased at Lowe’s. If you have any questions or comments feel free to email me or comment on this article.  Thanks for reading!

Rogue to Release Beer Using Wild Yeast From Brewer’s Beard


Oregon based Rogue Ales will be releasing a beer known as the “New Crustacean,” which will be crafted using wild yeast from head brewer John Maier’s beard! Although quite hilarious, this news is actually true! Rogue sent in several samples of yeast from their hopyards to White Labs in effort to brew with their own unique, local strain of yeast. As a joke, they sent several strands of hair from Maier’s beard in a petry dish along with their hopyard samples. It turns out that none of the hopyard samples were suitable for brewing, but White Labs did find a strain of yeast in Maier’s beard follicles that is viable and perfect for brewing! Haha. I’ve heard of harvesting yeast from beer bottles and carboys, but I’ve definitely never attempted harvesting them from facial hair 🙂 Either way, Rogue is doing test batches with the new strain at the moment, and plan to release their odd new beer sometime in 2013. You can read the full article on Rogue’s website.

Why Use A Stir Plate?

Stir plates are a great way to increase the potential of your yeast. By constantly stirring your yeast starter you can increase the amount of Oxygen in your solution, knock CO2 out of suspension, and keep the yeast in constant contact with the nutrients it needs to reproduce. With the power of these forces combined your yeast becomes Captain Planet! Actually what it really does is create much more yeast cells (with healthy cells walls) than your typical smack pack or dry yeast pack. Stir plates generally cost anywhere from $60 – $100 (and sometimes more). I’ve found a great thread on Homebrewtalk.com that walks you through building your own on the cheap. There is also another good one at Brewiki.org.

Yeast Washing Tutorial

[youtube=http://www.youtube.com/watch?v=tGvw0JV0oKo]
Another great video tutorial on washing yeast for use in later batches of homebrew by Don Osborne. I’m experimenting with this at the moment. This is a great way to increase your ABV, and also save you some cash.